
Hello Peeps
Well I apologise, it has been a while since I last blogged as life has just got in the way of crafty time. I will be redeeming myself with a hectic couple of weeks preparing for some fabulous shows on Hochanda with some super exciting new products! Watch this space for more details or why not join I love Indigo Blu's Unofficial Fan Page on Facebook for regular updates, videos, tutorials and giveaways? What are you waiting for?

Down to business. Kay, Sue and myself have had our heads together following feedback and come up with a new regular challenge to be posted on the I love Indigo Blu page. It is live now so why not join in to be in with a chance of a great surprise giveaway from Indigo Blu? The theme for this month is SUMMER.
Every month, Sue and I will be creating our take on the theme and posting step by step tutorials on our blogs to help you craft along or hopefully pick up a few hints and tips for using the products. Here is my card for Summer...

- Firstly cut a panel of Indigo Blu Watercolour Cardstock to measure 10x14.3cm
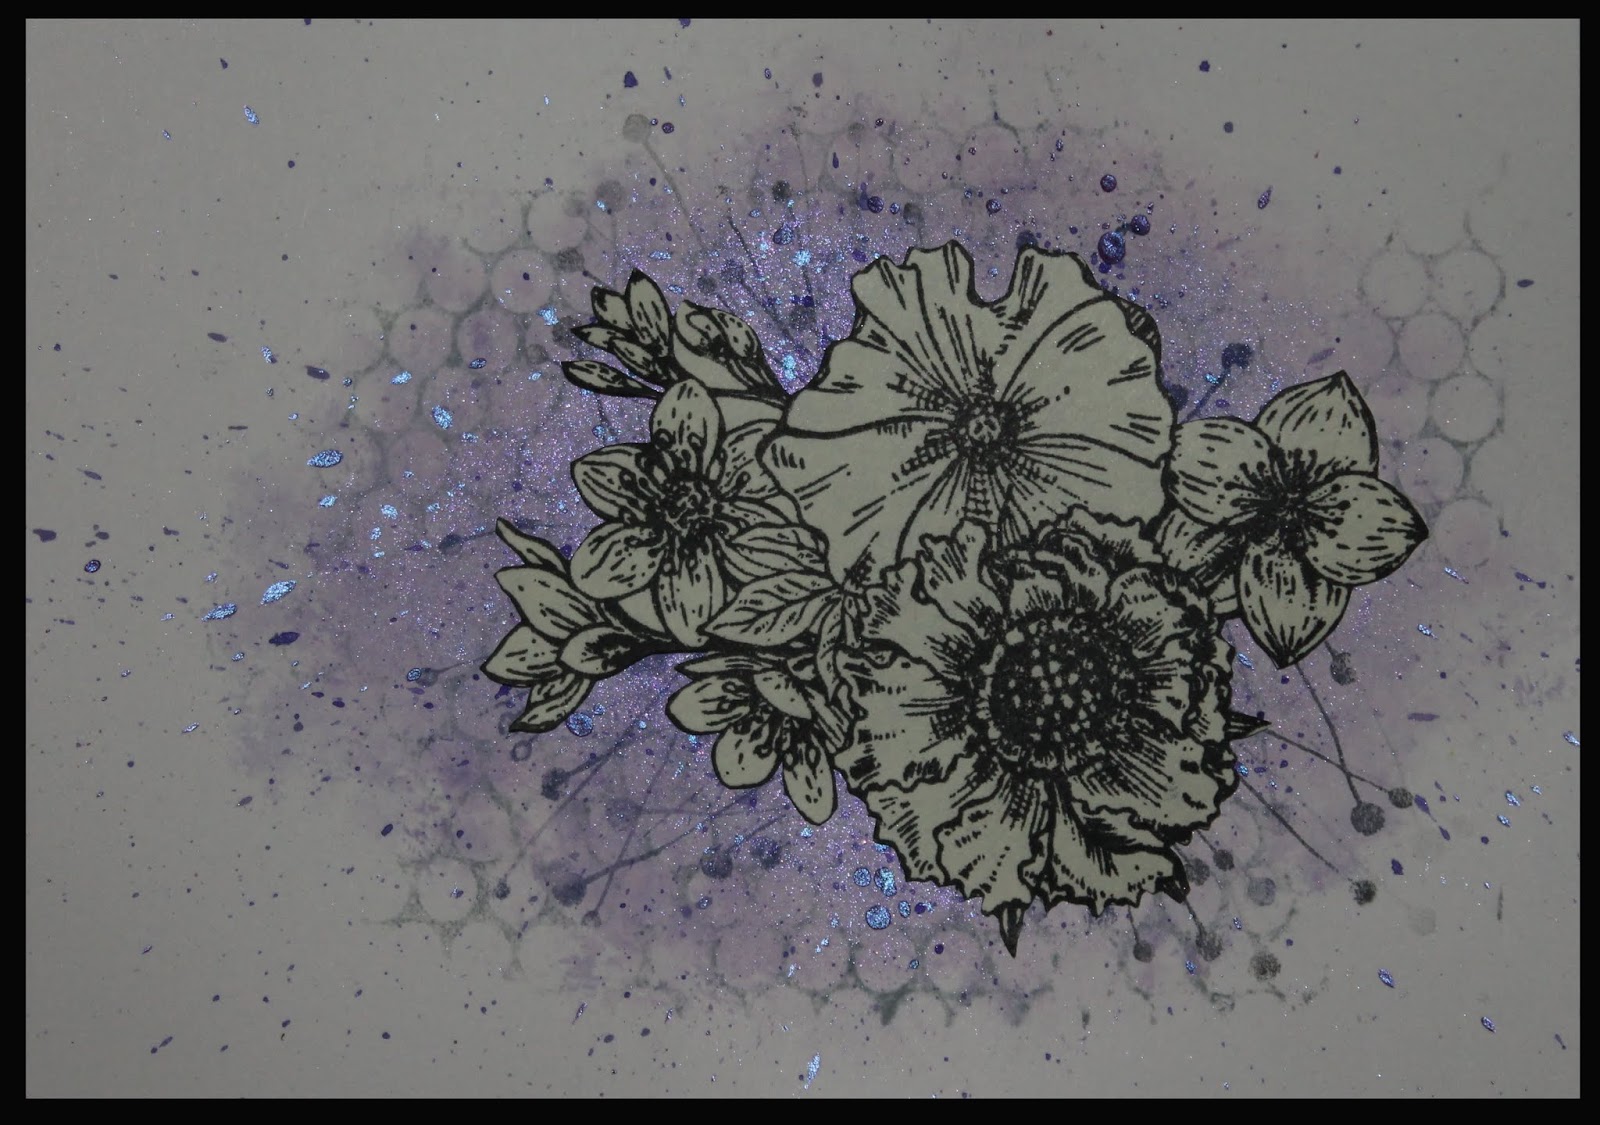
- Mix a little White Gee So Good with a little Wimberry Pie Acrylic Paint. Using a clean babywipe, gently pick up the paint and apply to the centre of your cardstock as shown below. Allow to dry

- Mix a little Crushed Velvet Luscious Powder with water and apply over the paint with another clean babywipe. Allow to dry

- Take a clean Slim Jim Acrylic Sheet and mix a little Park Lane Acrylic Paint with a tiny bit of water near to the edge. Flick the paint off the edge of the acrylic sheet with a small paint brush to create splatters of colour on the cardstock. Repeat this process with Indigo Blu Acrylic paint.
- Again, take a clean Slim Jim and mix a little water with Crushed Velvet Luscious Powder to the consistency shown below and flick as before


- Using Evergreen Bow Distress Ink, stamp the Honeycomb stamp onto the middle section of your card
- Stamp the Flower Power stamp onto a large post it note and cut out the main flower section to create a mask
- Using the Stamen Stamp from the Victorian Garden Stamp Set, stamp around your flower mask using a mixture of Blue Violet and Watering Can Archival Inks

- Leaving your mask in place, Cover the right hand side of card with another post-it before inking up the leaves part of the Flower Power Stamp using Blue Violet Archival Ink. Stamp to the left of the mask (the mask gives you an idea for the placement) Please note I have stamped the leaves in a different area to where they are placed on the actual stamp. Now move the post-it to the left and repeat the last step


- Ink the twigs part of the stamp using Onyx Black Versafine. Again, use the mask to help you with placement covering any other areas with a post-it to avoid marking the card
- Stamp the full Flower Power Stamp three times using Onyx Black Versafine onto Indigo Blu Watercolour card. Stamp the large Bee and two smaller bees from the Bumblebee Collectors Edition Stamp Set No. 9
- Using Wimberry Pie and Park Lane Acrylic Paint, start to colour the flowers. I find it easier to lightly moisten the area with water before watering down the paint and adding colour in light layers until I am happy. If you apply a layer and it is too dark, the water will allow you to blot some of the colour off with kitchen towel. Use Banana Custard and Burning Bonfire for the flower centres and bees and Olive Waistcoat for the leaves
- You can add a little coloured pencil to make areas pop if you feel the painting looks too flat

- Cut the bees and flowers out. I have removed the leaves and buds and cut two lots of the main flowers plus one additional copy of the Poppy
- Stick the main flower section in place with wet glue, followed by the leaves and buds. Add the next couple of layers with wet glue and set aside

- Mix a small measure of Porcelain Luscious Powder with water (idea of measures is shown below) and mix before spritzing onto the finished card panel for extra shimmer and shine

- Cut a panel of coordinating cardstock to measure 10.2x14.5cm and mat the finished card panel before layering onto a card measuring 10.5x14.8cm
- Add the small bees with wet glue and the large one with 3D glue
- Add a greeting if required

Here are the products I've used. To enter the challenge and a chance to win goodies from Indigo Blu just submit your entry on Facebook and a picture of the IB products used to make it.

Why not pop over to Sue's page for more sizzling Summer inspiration. Here is a sneaky peak at her wonderful trip down a Summery memory lane...

For all the products used, please visit Indigo Blu, here is the link.
I hope you've found this tutorial helpful? Please leave a message and any suggestions if there is something in particular you'd like to see in a step by step guide.
Thanks for stopping by and don't forget to join our Facebook Group for lots more creative inspiration.
Julie x


