Monday, 20 August 2018

Challenge Yourself - Vintage

Good morning lovelies

I'm here with a new monthly challenge over at I Love Indigo Blu... I'm excited to announce the Vintage Theme as it is so my thing! You can enter any design which is Vintage by design or colour so go get messy and enter your work to the I Love Indigo Blu Facebook Page here to be in with a chance of winning a fabulous surprise from Kay and Alfie. All the supplies used can be purchased at Indigo Blu here.

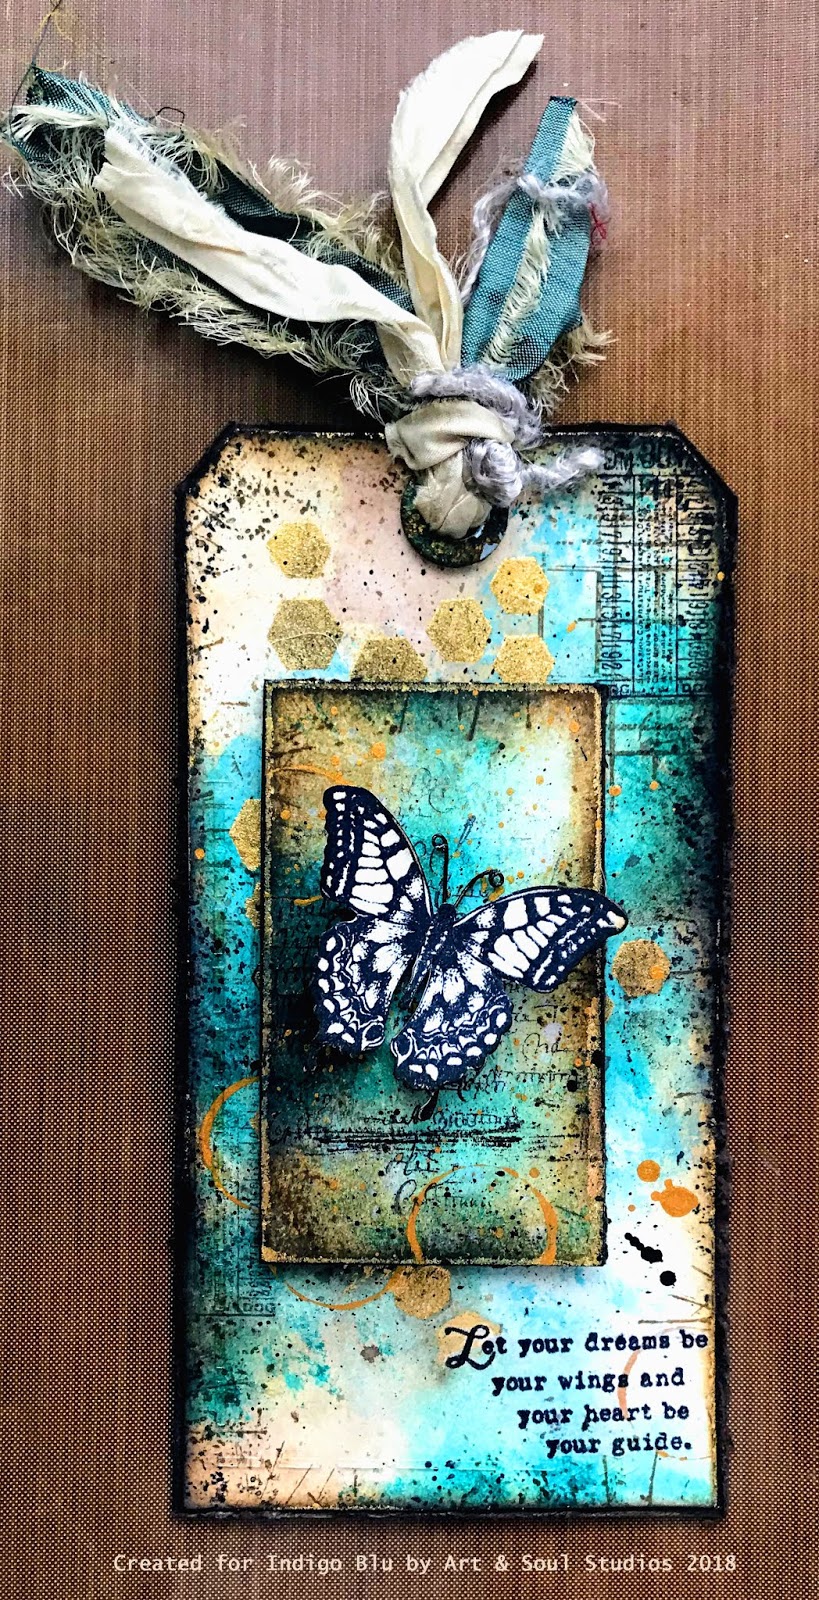
I decided to create a Vintage tag in the hope it inspires you to get creative.


This is how it was created...

Firstly, cut a tag. I used the Tim Holtz Tag Die which is an old favourite but you can just as easily cut one by hand. Cut a panel of cardstock 5cm x 8.5cm and repeat the process used on the tag but don't stamp the background

Take a clean baby wipe and gently apply Warm tan Acrylic Paint to areas of the tag


Next stamp the Ledger Background Stamp using Vintage Photo Distress Ink


Now apply Townhouse Teal using a baby wipe.  Try not to cover the previous application of paint completely, although the picture doesn't show the previous colour very well but it is still there.


Apply Teal for Two Acrylic Paint to add a little depth in colour before adding Ugly Duckling Acrylic paint to the edges of the card tag using Phatt Foam. Mix a little Ugly Duckling Paint with water on the edge of a Slim Jim Acrylic sheet. Using a paint brush, flick the paint off the edge onto the tag to create splatters


Stamp a ticket from the Grand Tour I Set in random areas using black archival ink. Ensure the whole tag is dry before rubbing over with a tumble drier sheet to remove any static. Take a piece of Phatt Foam and apply Flitter Glue sparingly through the Blueprint Stencil. Add Chariot of Fire Flake and remove and buff the excess using the rough side of a sponge. Catch the edges of the tag and additional panel using the Phatt Foam and the remaining Flitter Glue before repeating the Flake stage.


Take Walnut Stain Distress Ink and the splatter edge stamp from the Rugged Edge Stamp Set and catch the edges of the tag and panel until happy with the result. You can catch the edges with the ink pad to add extra depth and definition if required. Mount the tag and panel onto Dark Brown Cardstock. Remove the circle at the top of the tag using a punch or scissors


Take a metal washer and add Hot Cocoa Acrylic paint and dry with a heat tool - TAKE CARE this will be HOT). Now apply a little Townhouse Teal randomly and reheat. Repeat the process with Teal for Two and Goldfinger to create the effect of faux metal. Stick over the hole at the top of the tag using Super Slap it On


Add a little Goldfinger Acrylic paint to a craft mat. Dip a circle top into the paint and add randomly to the tag. Add a little to a Slim Jim with water and flick onto the tag and panel. Repeat with Gee So Good Black Gesso. Add a few random lines by dipping the edge of a steel ruler into the paint


Stamp the butterfly from the collectors Edition No. 13 using Black Archival and Indigo Blu Watercolour Cardstock. Cut out the Butterfly and attach metal antenna using thin wire. Stamp text from the Tasty Textures Stamp Set onto the middle of the panel before attaching to the tag using foam pads. Add the butterfly using 3D Gel

Stamp the quote from Nature III onto Rice Paper. Ensure it is dry before adding to the tag using Matte Medium. Add a few fibres through the hole to finish the tag


I hope you've enjoyed my interpretation of Vintage? Please leave a comment below if you have found this tutorial helpful and don't forget to enter the Challenge to be in with a chance to win a prize from Indigo Blu

Right, I'm off to make Samples for Indigo Blu's Christmas Show on Sunday 27th August... Jingle Bells, Jingle bells, Jingle all the way...

Hugs for now, Julie x 


Tuesday, 24 July 2018

Nature Challenges I Love Indigo Blu...

Hello lovelies

I hope you are managing to stay cool in this hot spell? It's quite unbearable (and I love the heat normally) so I've switched my fan on to hurricane strength and created a little Nature inspired panel - it hasn't been easy as everything blows away! I'm currently co-hosting the challenge over at I Love Indigo Blu Facebook Page. Why not pop over and see all the wonderful designs and inspiration from the members and the Design Team. If you'd like to enter you could win a fantastic surprise parcel from Kay and Alfie so why not get your Indigo Blu goodies put and join us. All the details are on the page.

Firstly I would like to say that this could easily be created on cardstock but I've opted for a  wooden panel. My supplies are shown below and can all be purchased direct from Indigo Blu here.


Using White Gee So Good  and Phatt Foam, give the panel a good coat. This can be dried with a heat tool but keep your distance so the gesso doesn't bubble.

Using the Indigo Blu Postmark Stencil, apply Texture Paste in three areas. It's worth thinking where you will be adding your Flower Image and Quote so the texture doesn't interfere with the stamping.


I wanted quite subtle colours to begin with so opted for Grandma's Teacup for the sky and blended this with Banana Custard to create a sage green colour for the grass. Add a little White Gesso through the middle to assist the blending of colours. I find it helps to give the panel a light spritz of water to help move the paint around.


Once dry, mix a little Mermaid's Tresses Luscious Powder with water and apply to the sky area with a baby wipe. Repeat the process for the grass with Mermaid's Tail Luscious Powder.  

I then added a little depth to the colour using Stormy Sky and Cut Grass Distress Ink. Use the Stormy Sky at the bottom of the panel as it will darken the grass area without being too heavy.


Create multiple layers to the panel by stamping a butterfly and texture in Black Archival Ink. It will take slightly longer for the ink to dry on the painted surface so after a couple of minutes blot the ink using kitchen towel to leave a faded image.


Apply another layer of texture stamped with Black Archival Ink but this time leave to dry completely. I used the Ink Pad to edge the plaque and catch a little of the raised Texture paste. I added a little oil pastel to the edges just to add a little more contrast.


Stamp the stem of the Poppy in the place where you wish the Flower Head to be. Turn the stamp around and stamp the opposite end of the stem, matching it up with the first stamped image, creating a full length stem. If you are in danger of the Poppy Head catching the panel, mask the area using a sticky note.

Stamp the Poppycock Flower Head on Watercolour Card by Indigo Blu.

Wet the area with water before applying Grandma's Teacup Acrylic Paint, following the lines of the stamped image. For added detail, use watercolour pencil to darken the middle of the flower. Use the same principle to colour the centre using Banana Custard and Burning Bonfire Acrylic Paint.

Cut out and stick the Flower Head in place using wet glue.


I chose to do the quote with clear embossing powder. Once heated and cooled, apply Black Soot Distress Ink over the entire area. After a couple of seconds rub with a soft cloth to remove the ink from the embossed words. I have experimented with many ways of doing this technique and find this works the best for me.

Cut up the quote and apply with wet glue to the bottom section of the panel.


Stamp the little Bumblebee from the Collectors Edition Number 9 Stamp Set next to the words and again as though it is flying off the edge of the panel. Tada... finished!

I hope this quick tutorial has given you some inspiration. Please leave a comment if so, it's lovely to hear from you.

Keep creating, Julie x

Tuesday, 17 July 2018

Artist Tools on Hochanda

Hello again

As promised here are my samples made using the fantastic new stamps from Indigo Blu.

Kay is live now on Hochanda - 6pm and again at 9pm then tomorrow at 9am and again at noon. I'm predicting a sell out, if you can place your bets... Seriously, the stamps are so exciting and perfect for Art Journaling, Mixed Media and Card making so what stopping you? The apron's are lush - heavy canvas with all the pockets you need to keep those essential tools on hand, enough space for the expanding waistline and long enough for those of us with a little added height. Absolutely perfect, can't wait to get my hands on one to use as well as decorate!

Anyhow, hopefully this will give you a taster of what you can do...

I hope you enjoy, Julie x


Artist Tools from Indgo Blu

Hello my creative friends...

Here's a quick heads up prior to the upcoming 'One Day Special' from Indigo Blu. Kay will be live on Hochanda today at 6pm and again at 8pm then again tomorrow at 9am and 12 noon. So why not take the weight off and tune in for some extra special stamps, canvas aprons and panels... you may have seen a few samples knocking around on Facebook and Instagram?

The stamps are perfect for art journaling, mixed media or cards, they have to be my favourite stamps to date. Don't blame me if you miss out - you've been warned, I predict a sell out!

I'll be back shortly with the samples I made for the show. You will be able to catch all the design teams fabulous creative makes by checking out Facebook here or Instagram. 

Have a great day and see you soon xx

Wednesday, 20 June 2018

I love Indigo Blu - June Challenge...

Hello Peeps

Well I apologise, it has been a while since I last blogged as life has just got in the way of crafty time. I will be redeeming myself with a hectic couple of weeks preparing for some fabulous shows on Hochanda with some super exciting new products! Watch this space for more details or why not join I love Indigo Blu's Unofficial Fan Page on Facebook for regular updates, videos, tutorials and giveaways? What are you waiting for?
Down to business. Kay, Sue and myself have had our heads together following feedback and come up with a new regular challenge to be posted on the I love Indigo Blu page. It is live now so why not join in to be in with a chance of a great surprise giveaway from Indigo Blu? The theme for this month is SUMMER.

Every month, Sue and I will be creating our take on the theme and posting step by step tutorials on our blogs to help you craft along or hopefully pick up a few hints and tips for using the products. Here is my card for Summer...

  • Firstly cut a panel of Indigo Blu Watercolour Cardstock to measure 10x14.3cm
  • Mix a little White Gee So Good with a little Wimberry Pie Acrylic Paint. Using a clean babywipe, gently pick up the paint and apply to the centre of your cardstock as shown below. Allow to dry
  • Mix a little Crushed Velvet Luscious Powder with water and apply over the paint with another clean babywipe. Allow to dry
  • Take a clean Slim Jim Acrylic Sheet and mix a little Park Lane Acrylic Paint with a tiny bit of water near to the edge. Flick the paint off the edge of the acrylic sheet with a small paint brush to create splatters of colour on the cardstock. Repeat this process with Indigo Blu Acrylic paint.
  • Again, take a clean Slim Jim and mix a little water with Crushed Velvet Luscious Powder to the consistency shown below and flick as before  


  • Using Evergreen Bow Distress Ink, stamp the Honeycomb stamp onto the middle section of your card
  • Stamp the Flower Power stamp onto a large post it note and cut out the main flower section to create a mask
  • Using the Stamen Stamp from the Victorian Garden Stamp Set, stamp around your flower mask using a mixture of Blue Violet and Watering Can Archival Inks
  • Leaving your mask in place, Cover the right hand side of card with another post-it before inking up the leaves part of the Flower Power Stamp using Blue Violet Archival Ink. Stamp to the left of the mask (the mask gives you an idea for the placement) Please note I have stamped the leaves in a different area to where they are placed on the actual stamp. Now move the post-it to the left and repeat the last step

  • Ink the twigs part of the stamp using Onyx Black Versafine. Again, use the mask to help you with placement covering any other areas with a post-it to avoid marking the card
  • Stamp the full Flower Power Stamp three times using Onyx Black Versafine onto Indigo Blu Watercolour card. Stamp the large Bee and two smaller bees from the Bumblebee Collectors Edition Stamp Set No. 9
  • Using Wimberry Pie and Park Lane Acrylic Paint, start to colour the flowers. I find it easier to lightly moisten the area with water before watering down the paint and adding colour in light layers until I am happy. If you apply a layer and it is too dark, the water will allow you to blot some of the colour off with kitchen towel. Use Banana Custard and Burning Bonfire for the flower centres and bees and Olive Waistcoat for the leaves
  • You can add a little coloured pencil to make areas pop if you feel the painting looks too flat


  • Cut the bees and flowers out. I have removed the leaves and buds and cut two lots of the main flowers plus one additional copy of the Poppy 
  • Stick the main flower section in place with wet glue, followed by the leaves and buds. Add the next couple of layers with wet glue and set aside


  • Mix a small measure of Porcelain Luscious Powder with water (idea of measures is shown below) and mix before spritzing onto the finished card panel for extra shimmer and shine


  • Cut a panel of coordinating cardstock to measure 10.2x14.5cm and mat the finished card panel before layering onto a card measuring 10.5x14.8cm
  • Add the small bees with wet glue and the large one with 3D glue
  • Add a greeting if required


Here are the products I've used. To enter the challenge and a chance to win goodies from Indigo Blu just submit your entry on Facebook and a picture of the IB products used to make it.


Why not pop over to Sue's page for more sizzling Summer inspiration. Here is a sneaky peak at her wonderful trip down a Summery memory lane...


For all the products used, please visit Indigo Blu, here is the link.

I hope you've found this tutorial helpful? Please leave a message and any suggestions if there is something in particular you'd like to see in a step by step guide.

Thanks for stopping by and don't forget to join our Facebook Group for lots more creative inspiration.

Julie x

Friday, 8 June 2018

Lou Lucious....

Good morning Lovelies

As promised, here I am with the samples made for Lou's Indigo Blu shows live today on Hochanda. You can catch her at 12 and again at 4pm. Why not grab a coffee and relax for a little while as Lou inspires you with her uses for the fabulous new colours of Luscious Powders. If you're not excited yet wait till you hear their names!

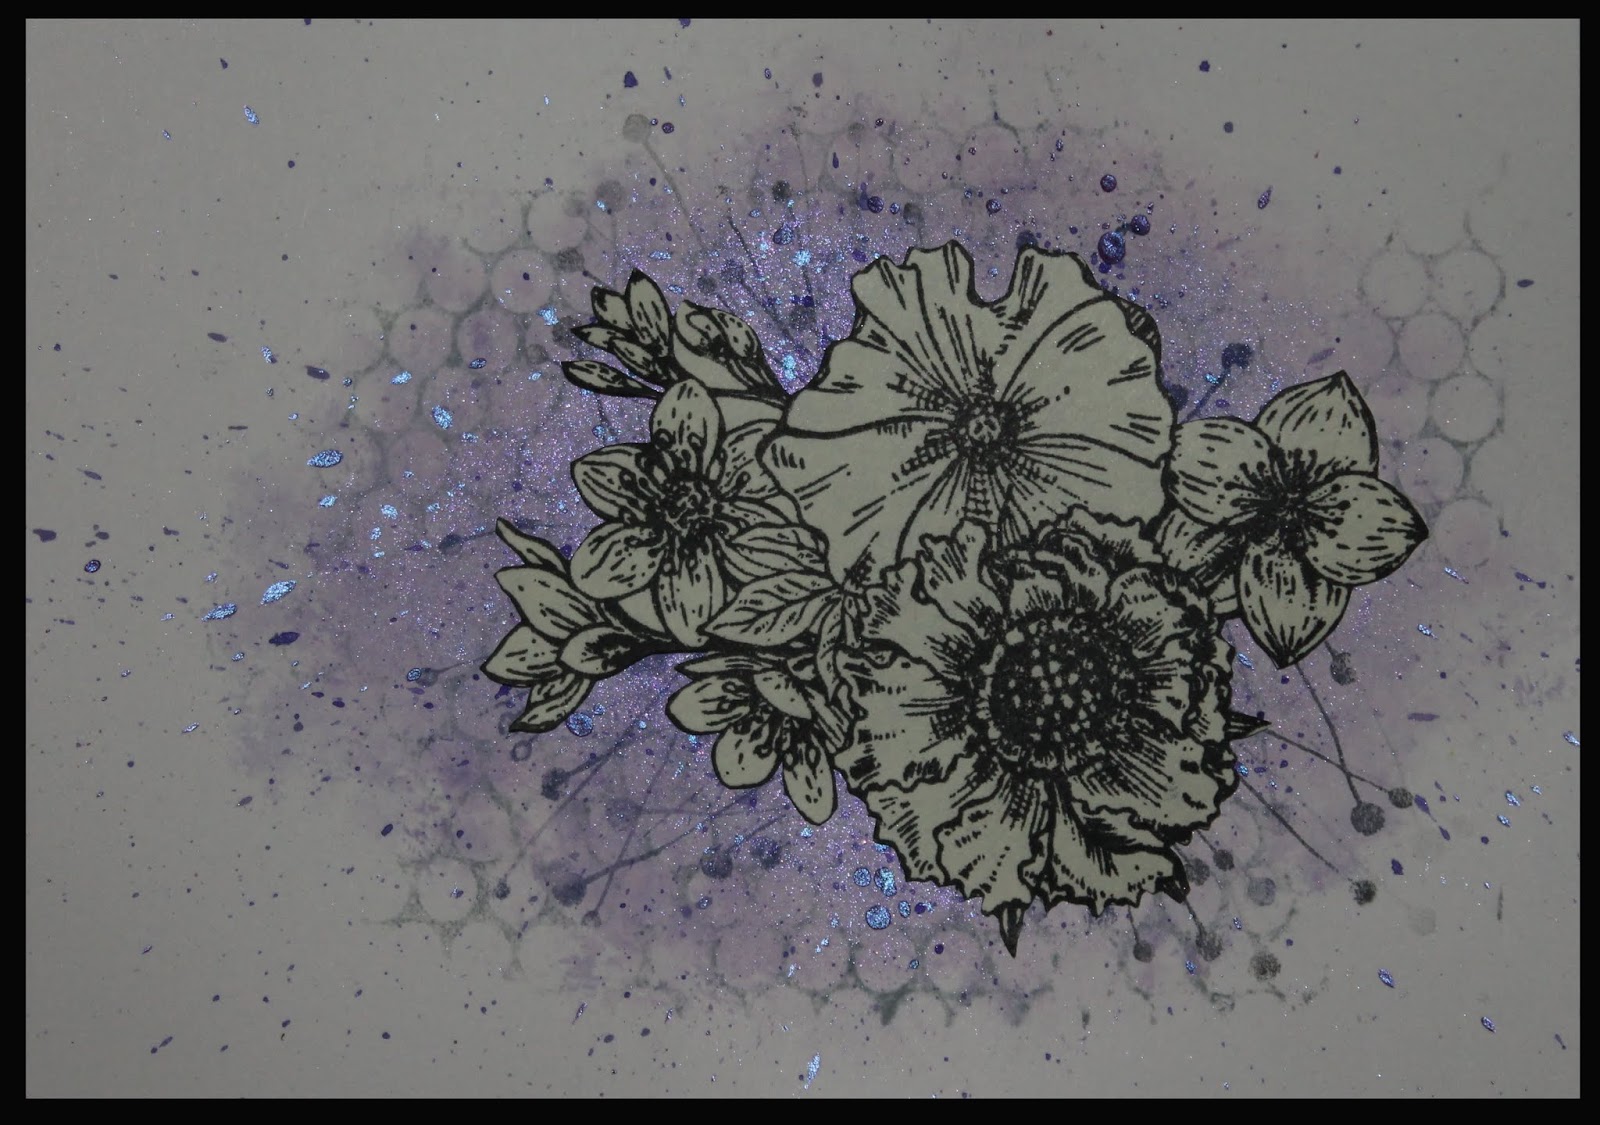
These are my samples made using a wide collection of Indigo Blu's deep red rubber Stamps, Luscious Powders, Paints and of course, the brand new Stencils. The stencils are so new just a few of the design team got less than 12 hours to play with them before the show.

So here's what I came up with. The pictures really don't show the impressive shimmer and sparkle of the Luscious Powders but hopefully you'll get the impression...


The design team have created many fabulous samples so enjoy the show. Why not leave a comment or email the show at studio@hochanda.com. and show Lou some love. Let us know what your favourite Indigo Blu products are or if you'd like to see something in particular?

Tata for now, Julie xx

Thursday, 7 June 2018

New luscious love...

Hi everyone

I hope you’re having a great week with plenty of creative play?

It’s been a funny couple of weeks here with one thing and another. I’ve spent the last couple of days making bunnies for babies. My daughter’s friend has just had a beautiful little girl so Tilly shown below is for her name sake. Another pure white bunny is for an ex-student of mine who’s little boy was born sleeping. I started making him before the sad news and have completed him and given him a green bow as we all wore something green for the funeral. It doesn’t feel right that he remains with me so he’ll gojng to Harrison’s mummy soon.


Anyhow, this is a quick post with details about our upcoming shows on Hochanda. The lovely Lou will be on Friday at 12 and 4pm with lots of fab new crafty stash from Indigo Blu including three new luscious colours which are to die for! Why not watch live online, click here  for show details. Don’t miss out as the colours are going to be a huge hit along with fabulous stamps and wonderful new stencils.

I’ll be back Friday with a little bit of inspiration in the way of pictures of my samples using all the great products. If you’re eager to know what’s coming, keep an eye on Instagram and Facebook for more sneaky peaks.

Don’t forget to take advantage of the fab 20% discount on selected stamps for your Father’s Day cards. Check out my previous post for all the deets.

By for now, Julie x